
Do you want to know how to change a theme in WordPress? So that you can change the aesthetics and give a new flavor to your WordPress website. Then, here we go.
It goes without saying that WordPress is one of the most user-friendly Content Management Systems (CMS) available out there. And changing WordPress themes is now simpler than ever.
In fact, are you aware that as per web credibility research from the Stanford, 75% of users evaluate the legitimacy of a brand based on the aesthetics of its website?
So, it’s critical to design an eye-catching website from the start. Or you can always change a theme as better late than never.
In this article, we’ll walk through step by step how to change a theme in WordPress easily. Just stick with us through the journey.
What Things to Consider Before Changing a Theme?
Before getting ahead, let’s check out a few of the important things to consider before changing a theme. Such as:
- It’s a must to have a backup of your current website. So, just in case anything goes wrong, you don’t have to sweat up.
- Be aware that additional CSS code is not transferred while changing the theme. So, make sure you have a proper record sheet of them.
- Ensure you’ve saved the manually contributed code snippets, tracking codes, shortcodes, widgets, schema data, etc.
- Check out the loading speed of your website on your existing theme. This helps you make comparisons later with the changed theme.
Therefore, do put effort into making sure that no part of your website is impacted by the change. Consequently, this makes your transition easier and smoother.
Having said that, let’s move forward.
How To Change a Theme in WordPress? (Step-By-Step)
Here, we’ll explore how to change a theme in your WordPress site step by step. Therefore, follow along as we lead you on this voyage.
Step 1: Take the backup of your WordPress website.
As previously noted, spend some time backing up your website before even exploring new themes.
All you have to do is simply install a WordPress backup plugin, store the backup to your PC and you’re ready to go.
So, let’s see how you can do that here.
I) Install & Activate the Backup Plugin
First thing first, log in to your WordPress dashboard to download the backup plugin. Not to mention, you can find tons of free and premium backup plugins in the market.
Here, we’ll be using the UpdraftPlus backup plugin. It’s one of the most popular WordPress backup and restore plugins out there.
From the left navigation of your dashboard, go to the ‘Plugins’ and click on the ‘Add New’ option.
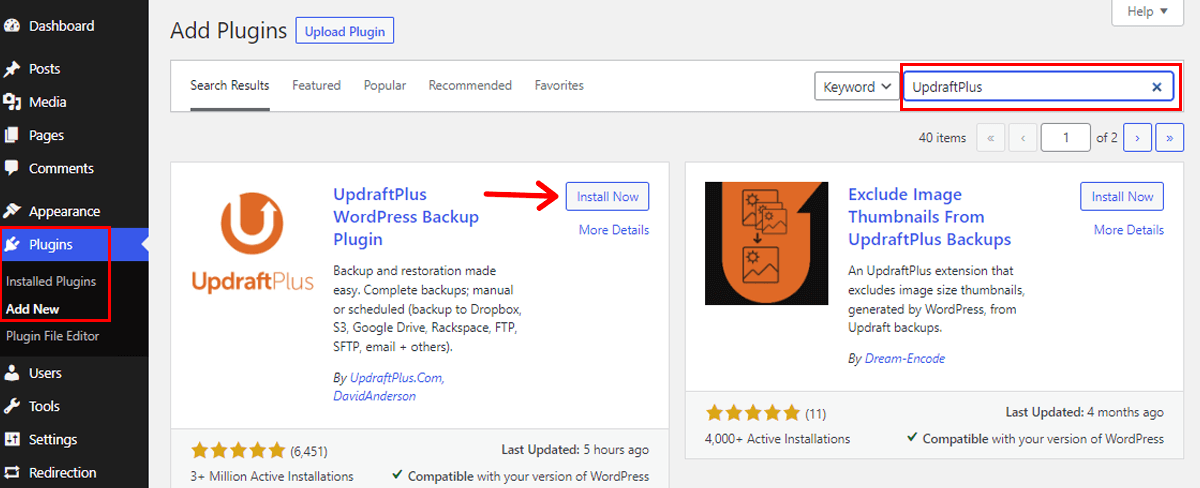
Now, on the top right corner of your dashboard, type ‘UpdraftPlus’ in the search box. After you have located the plugin, hit the ‘Install’ button.
Following that, you’ll see the ‘Activate’ button, click on it.
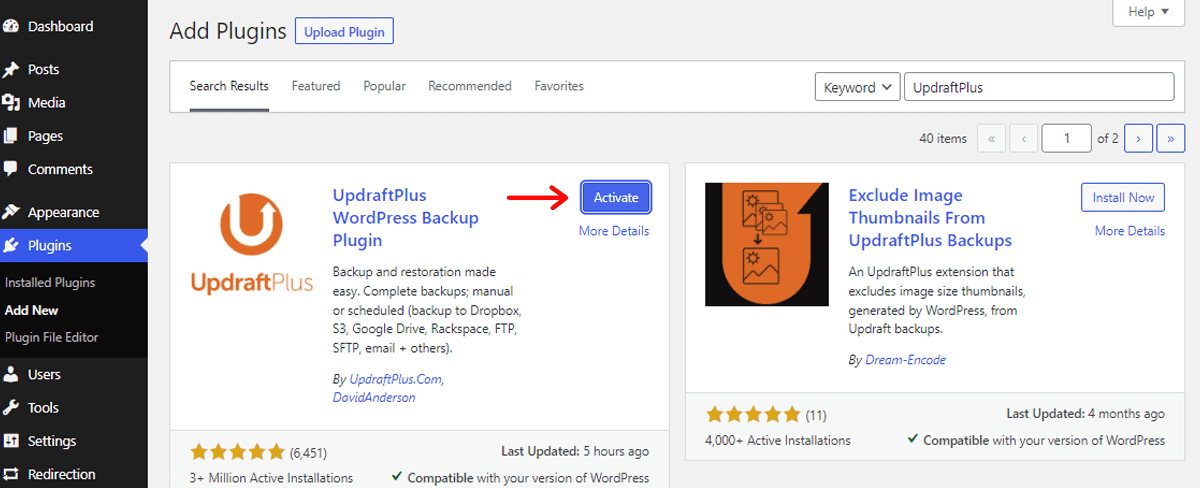
With that, you’ve successfully installed the UpdraftPlus backup plugin.
II) Go to Settings and Take Backup
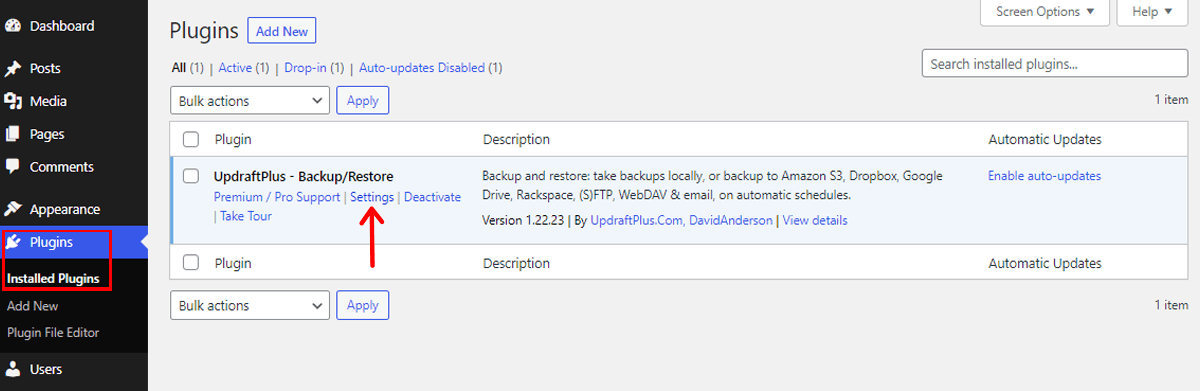
Next, in the ‘Installed Plugins’ section, you can see the ‘Settings’ option of UpdraftPlus. Simply click on it.
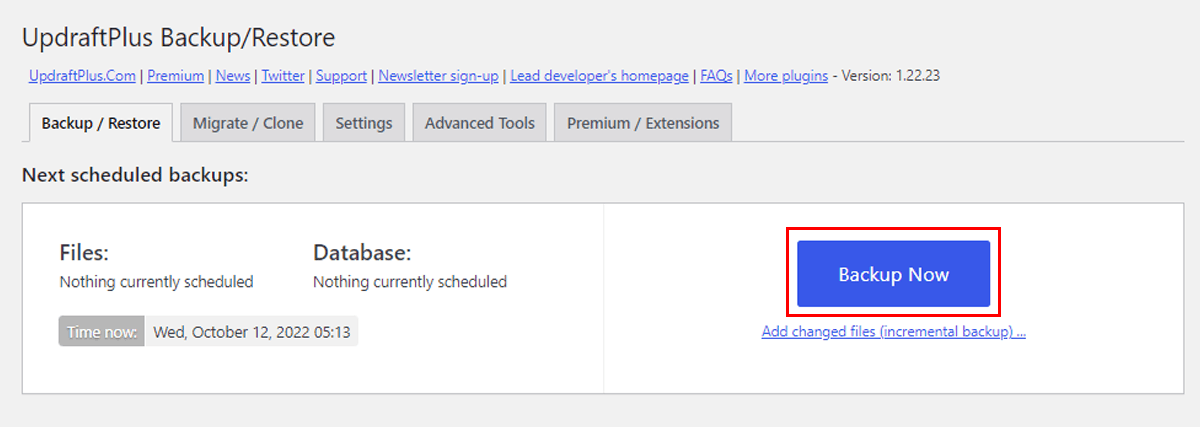
With that, you’ll see the page as shown in the below snapshot. Now, all you have to do is click on the ‘Backup Now’ option. And the backup of your website is done. Pretty easy, right?
Step 2: Turn on maintenance mode for your WordPress site. (Using SeedProd)
Once you’re done with the backup of your WordPress site, it’s wise to place it in maintenance mode. This helps you to inform your visitors of your under-construction mode.
For this purpose, we suggest using the SeedProd plugin. This plugin is popularly known for quickly building stunning coming soon and maintenance mode pages for your site.
So, let’s see how you can do that more clearly.
I) Install & Activate the SeedProd Plugin
Same as before, from the left navigation of your dashboard, go to the ‘Plugins’ and click on the ‘Add New’ option.
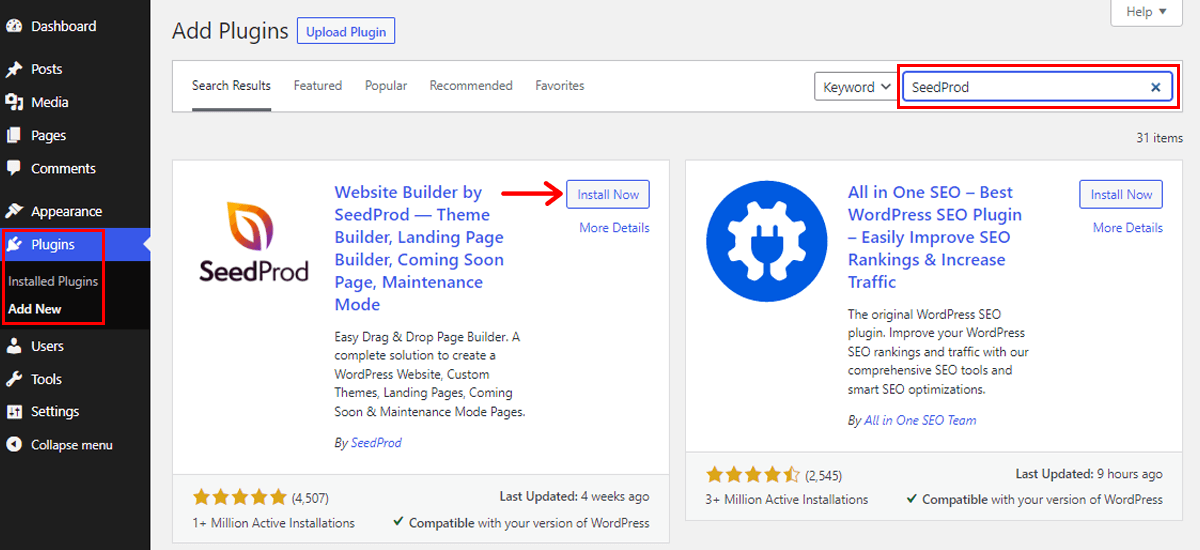
Now, on the top right corner of your dashboard, type ‘SeedProd’ in the search box. After you have located the plugin, hit the ‘Install’ button.
Following that, you’ll see the ‘Activate’ button, click on it.
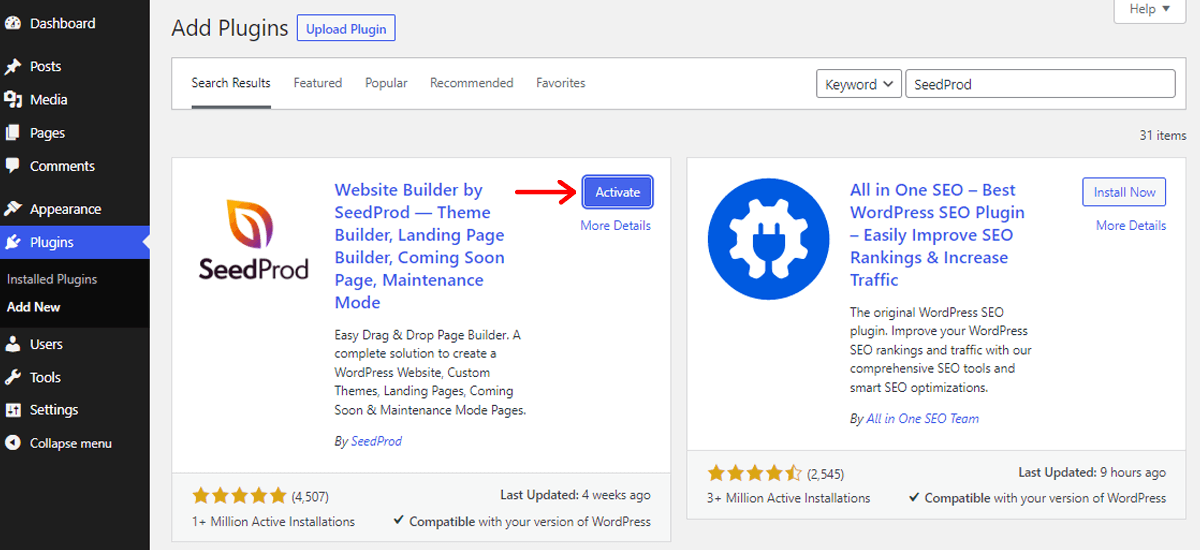
With that, you’ve successfully installed the SeedProd plugin.
II) Turn on Maintenance Mode
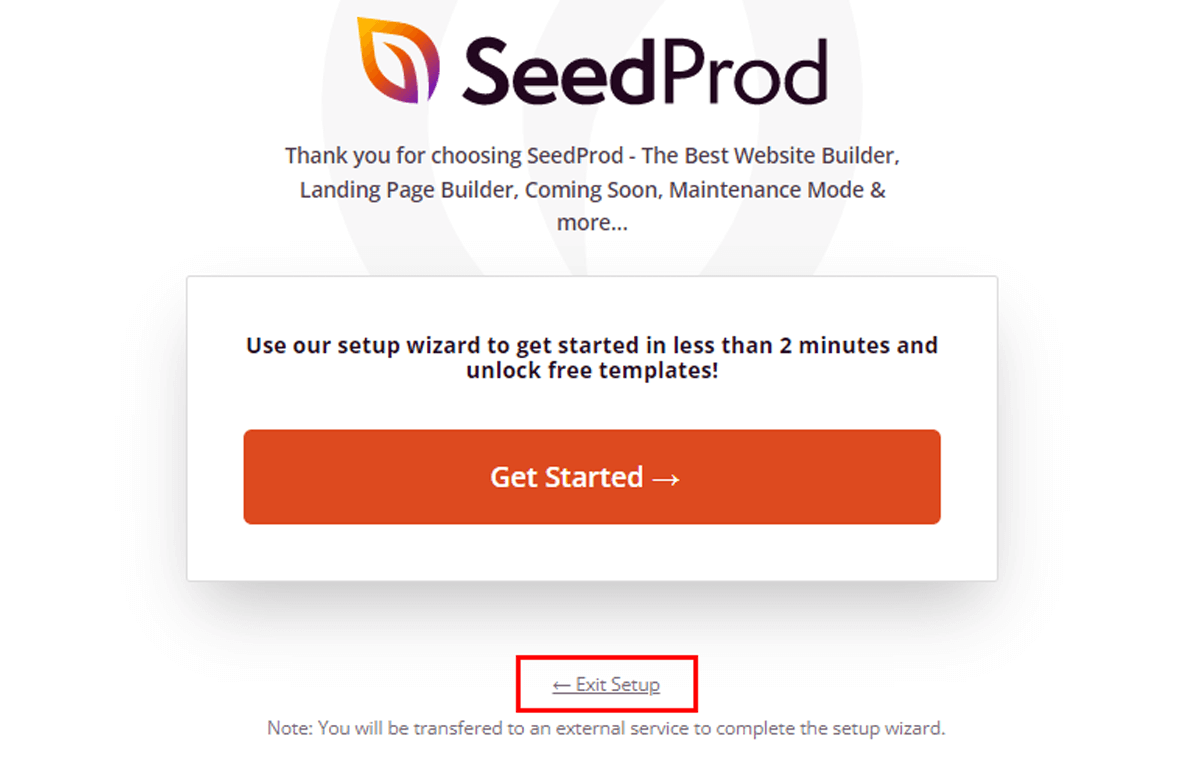
Now, you’ll see the Thank You page where you can Get Started with its Setup Wizard. Or, you can just click on the ‘Exit Setup’ option.
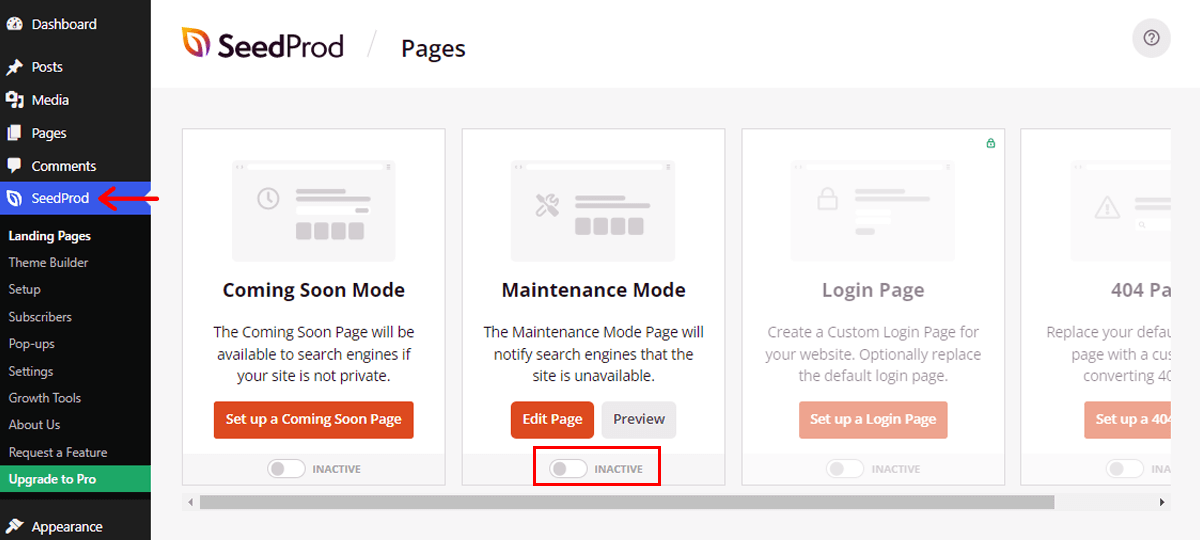
Following that, you’ll see the page as shown below on your WordPress dashboard.

Then click on the ‘Inactive’ button of Maintenance Mode to enable it. Then, just right above it, you’ll see the ‘Set up a Maintenance Mode Page’ option. Click on it.
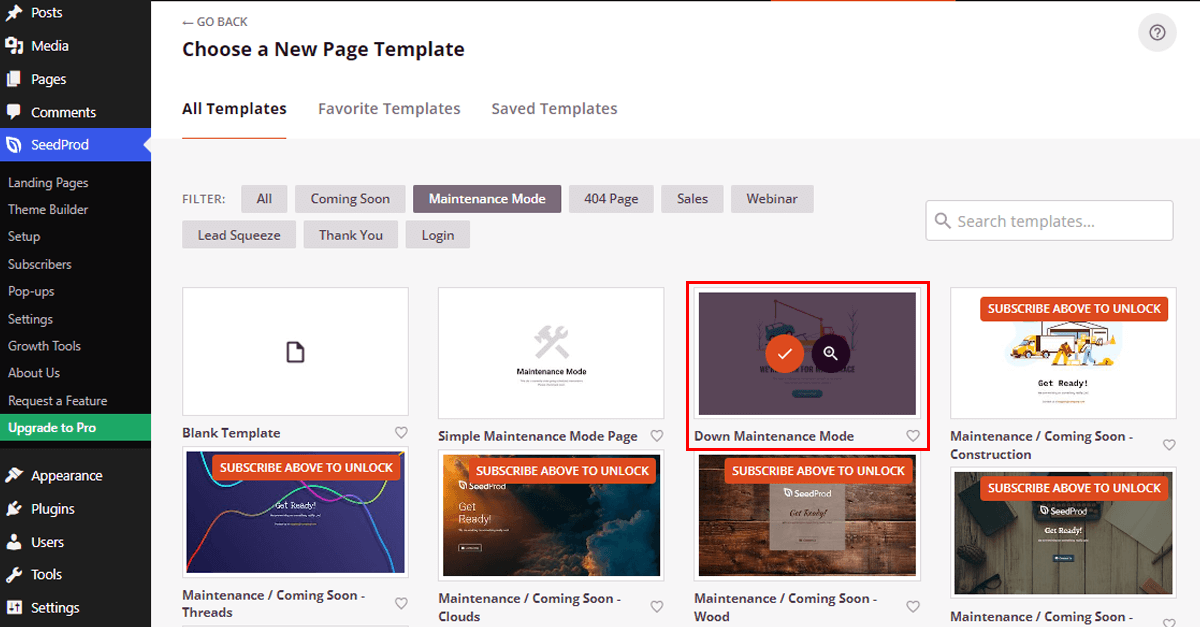
III) Choose your Maintenance Mode Template
Afterward, you can find the various available maintenance mode templates.
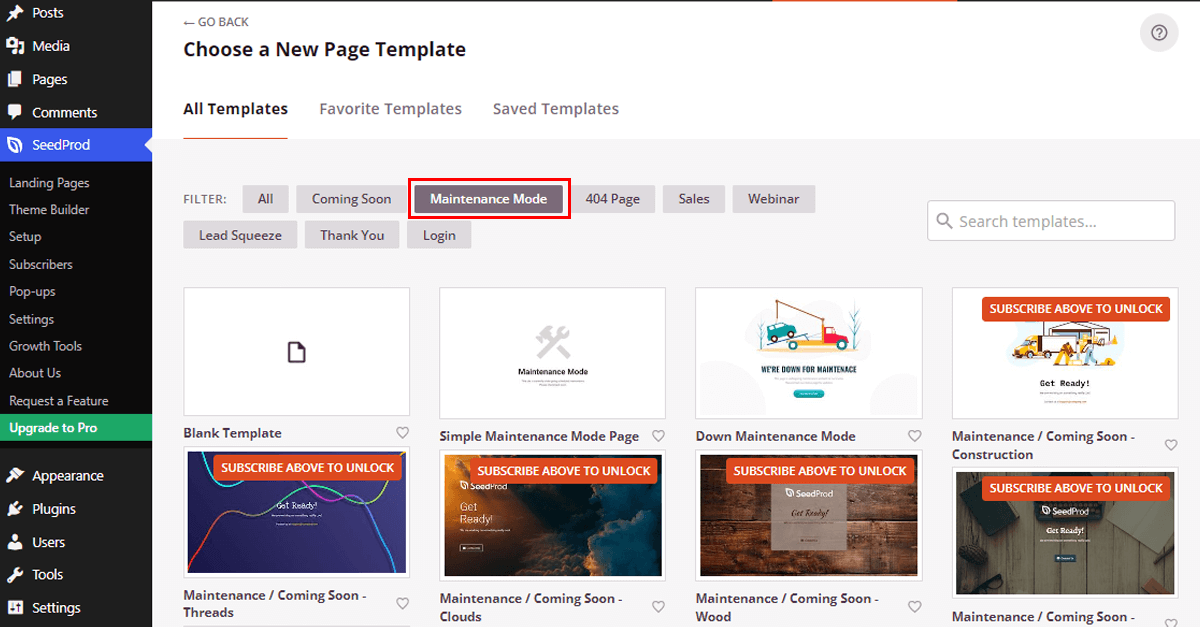
Few are available for free, meanwhile, for some, you have to upgrade to the SeedProd premium version.
Now all you need to do is ‘hover over your chosen template’. Then, you will see the check (✓) button. Click on it.
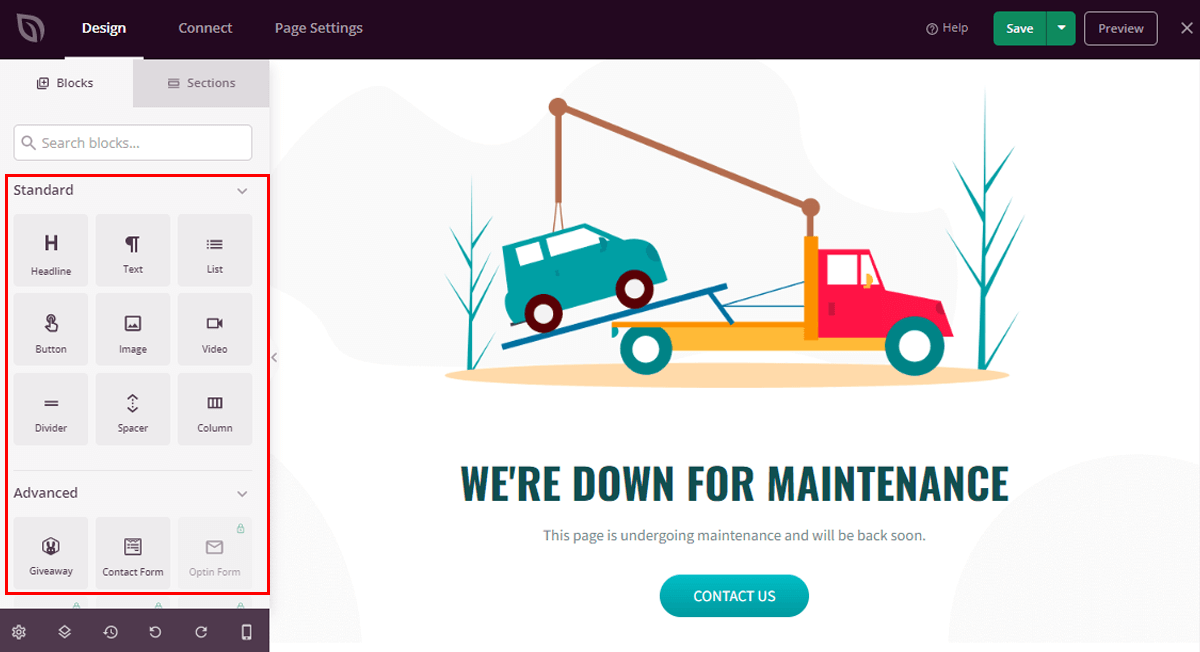
IV) Customize and Publish the Template
You can now edit your maintenance mode page using the drag-and-drop page builder in SeedProd.
All you have to do is ‘Drag the Elements’ from the left-hand side to the right-hand side. This way, you can effortlessly tailor your maintenance mode page instantly.
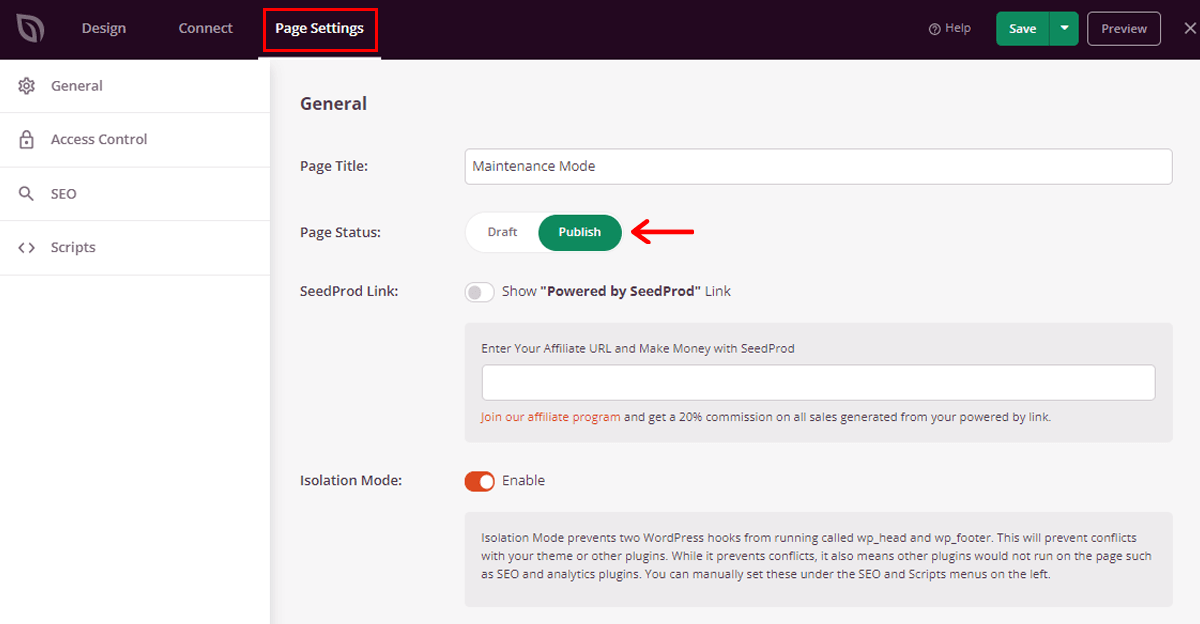
Once finished, click the ‘Save’ option in the top right corner. Following that, go to the ‘Page Settings’ tab and switch the Page Status to ‘Publish’.
With that, let’s move forward to the next step.
Step 3: Pick your ideal WordPress theme and install it.
Following the aforementioned steps, now the next step is to pick your ideal WordPress theme and install it.
In fact, you’ll be delighted to know that there are thousands of free and paid WordPress themes to choose from. Well, picking one from the vast bundle is definitely an overwhelming job.
To make it easy for you, as of now, let’s go over the Astra theme.

It’s one of the most popular performance-optimized WordPress themes with over 1 million active installs. You can use it for any type of website whether it be a blog, portfolio, eCommerce, and so on.
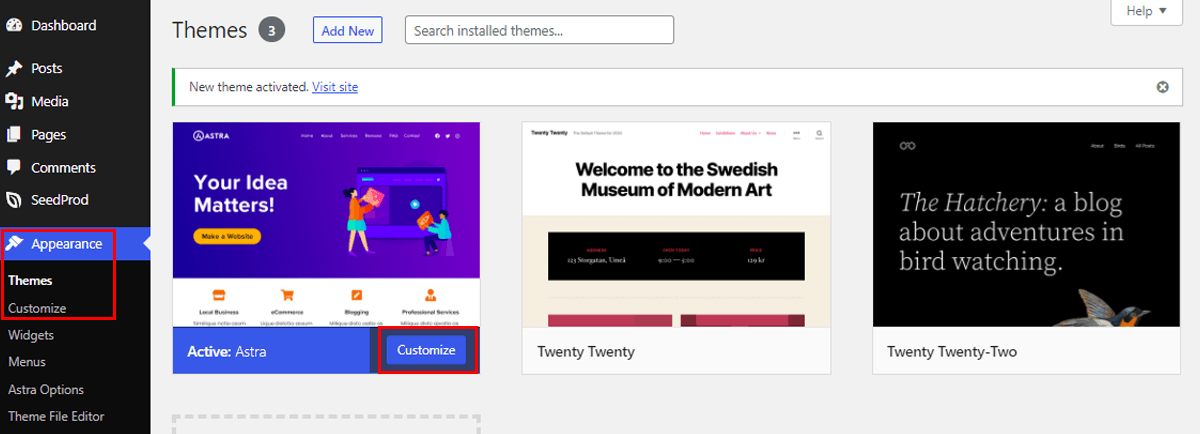
Now, from your dashboard, head over to the ‘Appearance’ and click on the ‘Add New’option.
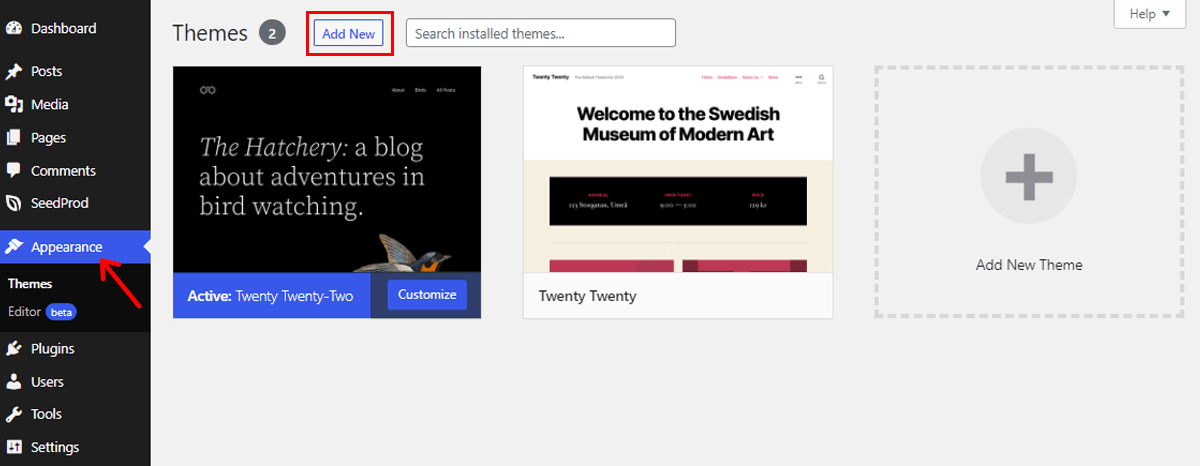
With that, you’ll see the page as shown in the snapshot below. From here, you can easily search for your desired theme from the ‘Search themes’ box in the top right corner.
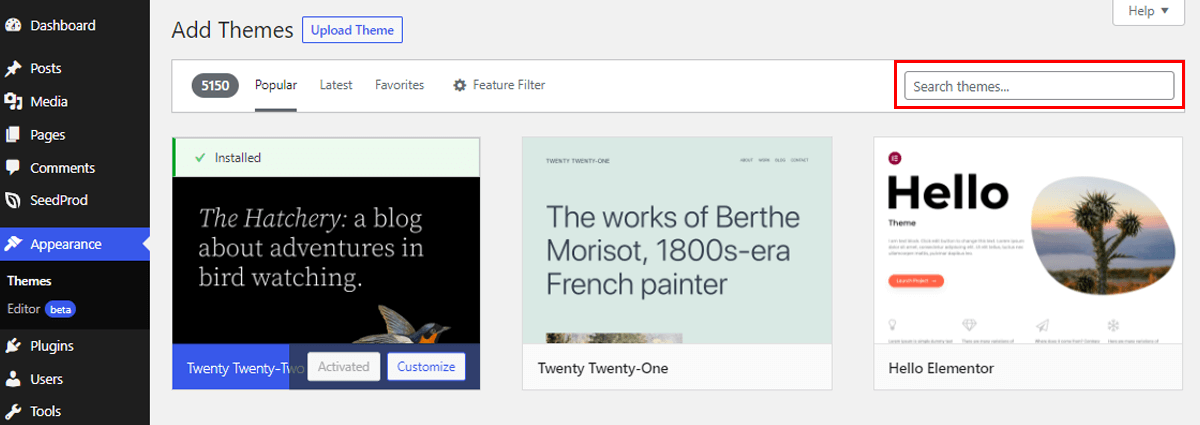
Or, if you’ve purchased any of the premium themes, then you can click on the ‘Upload Theme’ option to upload the zip file.
For now, type ‘Astra’ in the search box. And once, you have located the theme, hover your mouse over the theme.
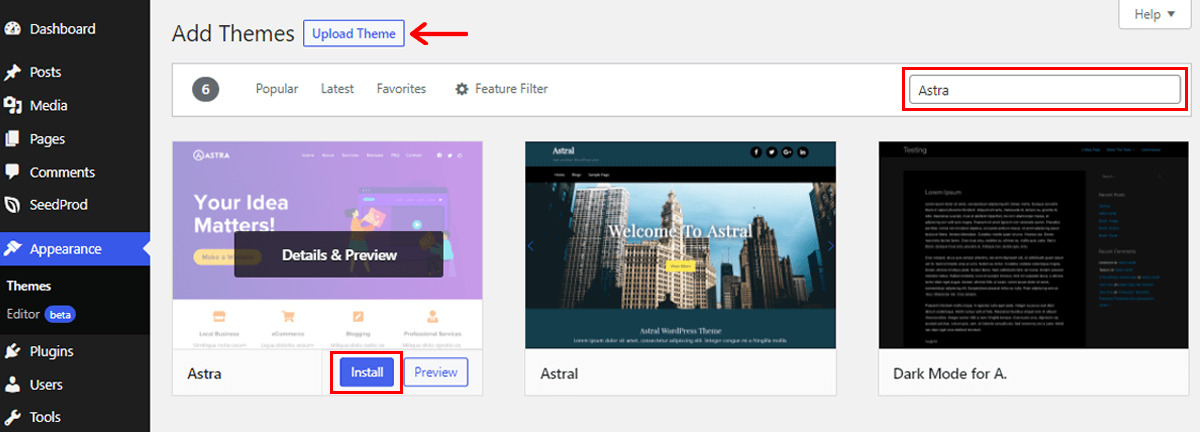
Then, click on the ‘Install’ option right beside it. Not to mention, you can also click on the ‘Details & Preview’ option to explore the theme in more detail.
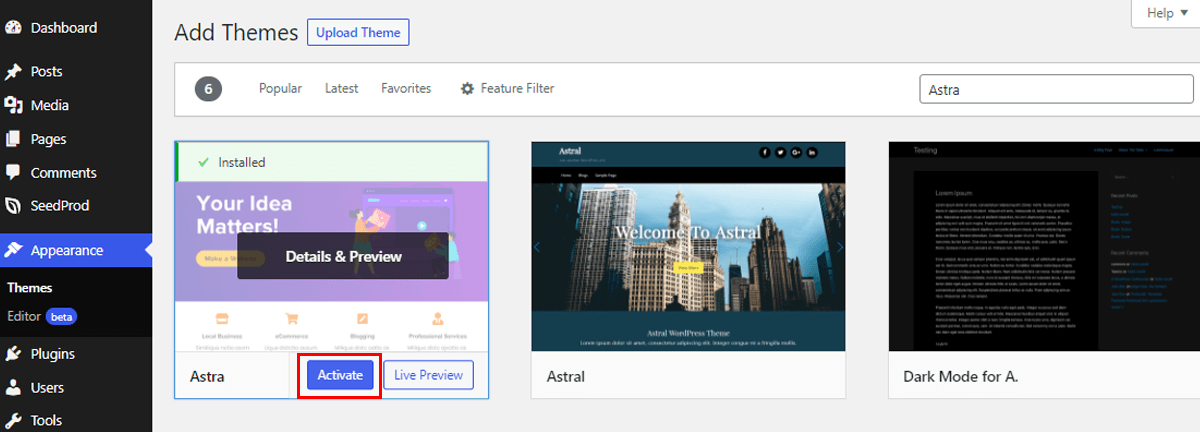
Step 4: Activate your theme and start customizing it.
Following that, you’ll see the ‘Activate’ option, simply click on it.
Further, you’ll see the ‘Astra Options’ button on the left navigation. You can simply click on it to explore the available features and functionalities.
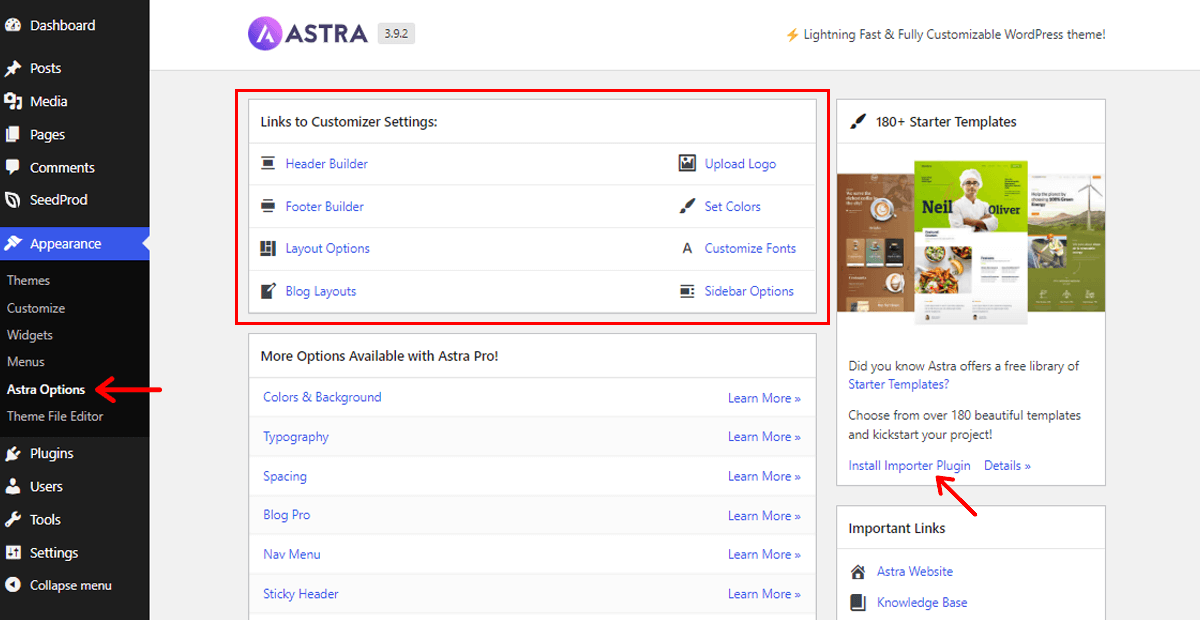
From here, you can get the ‘quick links to customizer settings’. You’ll also find the direct link to install the ‘Importer Plugin’. You can simply click on it to install the plugin.
This will further help you choose from various beautiful templates and start your work right away.
Alternatively, you can also navigate to ‘Appearance’. And click on the ‘Customize’ option to explore all the customization possibilities of Astra.
With that, you’ll be directed to the customization page as shown below.
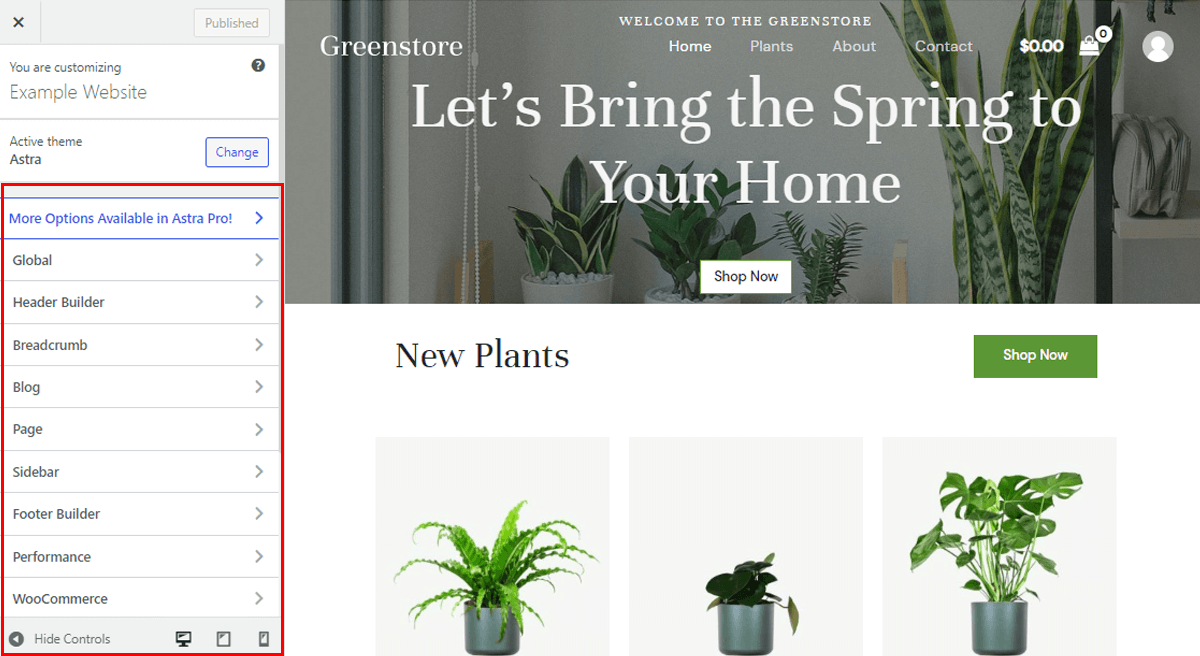
From here, you can make all the customization to your website from the choices available on the left-hand side. Along with that, you can see the live preview of the changes made on the right-hand side. Pretty awesome, right?
So, if you’re planning to change it to any other theme other than Astra, then also there is nothing to worry about. As the process is quite the same.
Step 5: Check and restore the necessary components.
After the customization process, now do check the necessary components of your site that you’ve previously taken note of.
If you find any of the necessary elements or components like plugins, codes, etc, missing, then there is nothing to worry about. You can easily restore it as we’ve taken the backup of the site in Step 1.
For that, all you’ve to do is navigate to ‘Settings’ and click on the ‘UpdraftPlus Backups’ option.
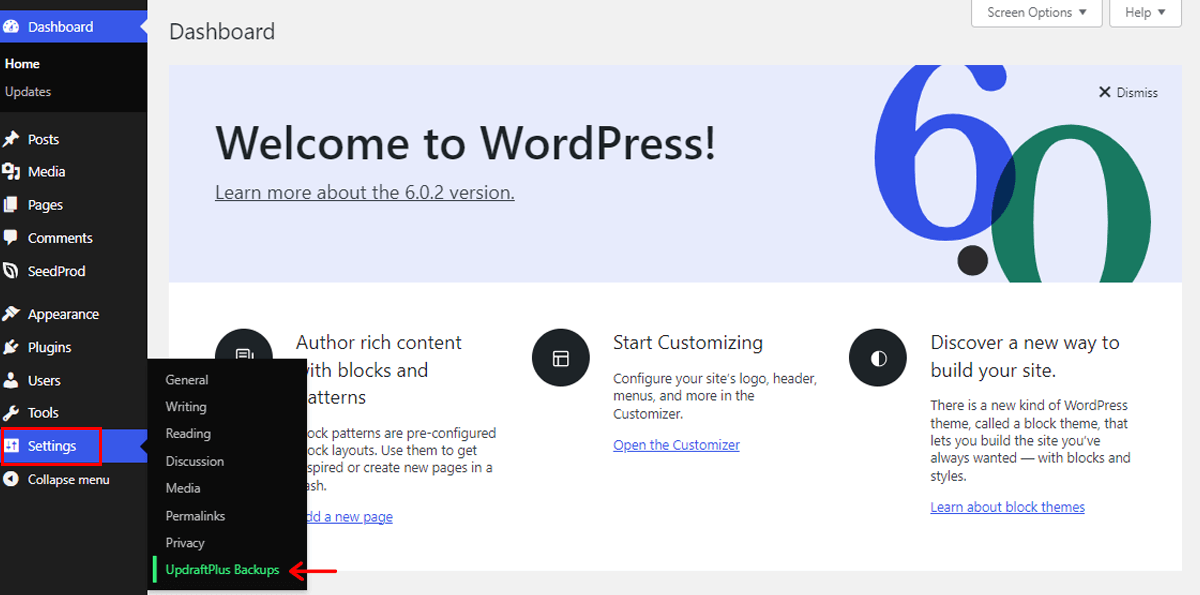
There, you can see the available options of what you want to restore. Like databases, plugins, and so on.
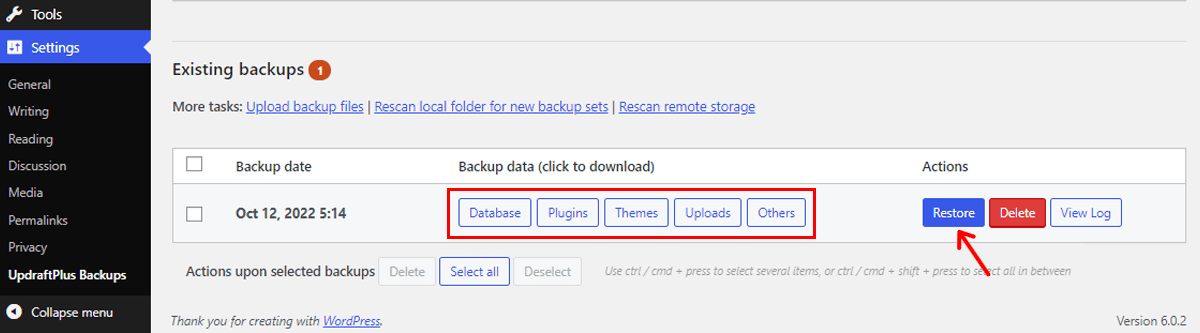
Simply, click on the ‘Restore’ button as shown in the above image, and your restore is done.
Step 6: Turn off maintenance mode and make your new theme layout live.
Last but not the least, all you have to do now is turn off the maintenance mode. To do that, simply navigate to the ‘SeedProd’ option in the left navigation.
And, click on the ‘Active’ button to inactive it. And you’re done. With that, your visitors will now see your new theme layout on your WordPress website.
What to Take into Account after Changing a Theme?
Well, the work is yet not completed. You still have to do a few tasks to ensure that your site is functioning well. So, some of the major things to take into account after changing a theme are:
- Do verify if your website design varies between browsers since each browser displays website elements differently.
- Check the loading time of your newly changed theme. And if it’s slow, then take the necessary steps.
- Many WordPress themes contain various built-in plugins. So, to keep things tidy and structured, remove any duplicate or unneeded plugins.
- Keep track of site statistics like bounce rates, time spent, engagement rate, etc. This will give you a decent idea of how effective your theme change is.
- Collect user feedback regarding how they felt after browsing through a new theme. This way, you can get their advice for the betterment.
Conclusion
That’s it, folks! We’ve come to the end of this journey on how to change a theme in WordPress.
We believe you can now effortlessly change your WordPress theme and offer a new aesthetic flavor to your users.
Please don’t hesitate to ask any kind of queries if any in the comment section below. Also, if you’ve successfully changed your theme by reading this tutorial, then do share your experience.
You may also like our other related tutorial articles. Such as how to add/edit menus in WordPress and how to change the author of a WordPress post.
Do make sure to go through what is A/B testing in marketing once to create successful email campaigns.
If you found this article helpful, then do spread the word with your friends and family. Lastly, follow us on our social media handles Twitter and Facebook to stick with our content.