This tutorial was last checked against WordPress v5.8.1.
Are you looking to add or edit the menu in WordPress for your site? Here we’ll show you exactly how to go about doing that.
When it comes to building website, WordPress is all the rage. In fact it’s so popular, that today over 40% of all websites run on WordPress. Why is it so popular? Well, it makes building websites super easy and super fast. It’s very customizable and you can essentially create any type of website without ever touching code.
Customizing menus is easy with WordPress
Unlike most platforms, WordPress offers you complete control over your page, with little to no limits. Be it themes, format, authors, or menus, you can change your WordPress site to look exactly the way you want so that it can be wholly unique to your style.
You’ll need to tailor several aspects of your site to make the site seem more cohesive and user-friendly to your audience. One thing to customize is menus. Although it seems tedious, it is a straightforward process, and you’ll end up with an organized menu that your audience can make use of to its fullest.
The key is to make a menu that can guide users to the exact content and posts they are looking for. Wondering how you can do that? Here’s a guide to editing your custom menu on WordPress.
How to change the menu navigation in WordPress
Table of contents
Step #1: Create / select a menu
The first thing you need to do is create the menu if you don’t have an existing one.
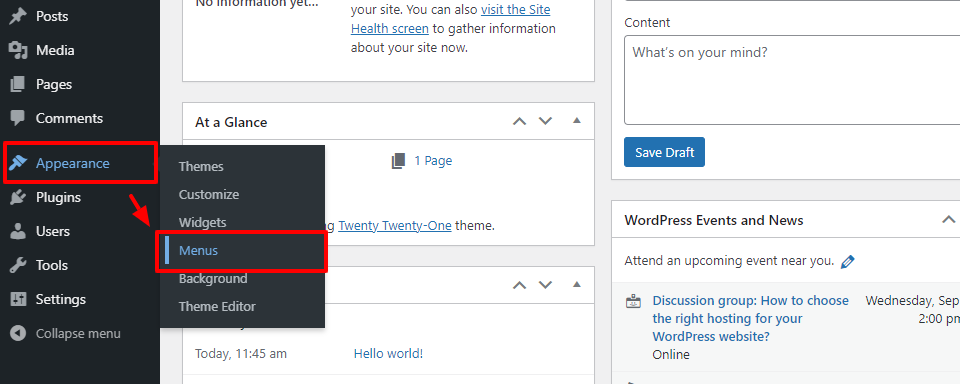
- With your WordPress dashboard open, select Appearance > Menus.
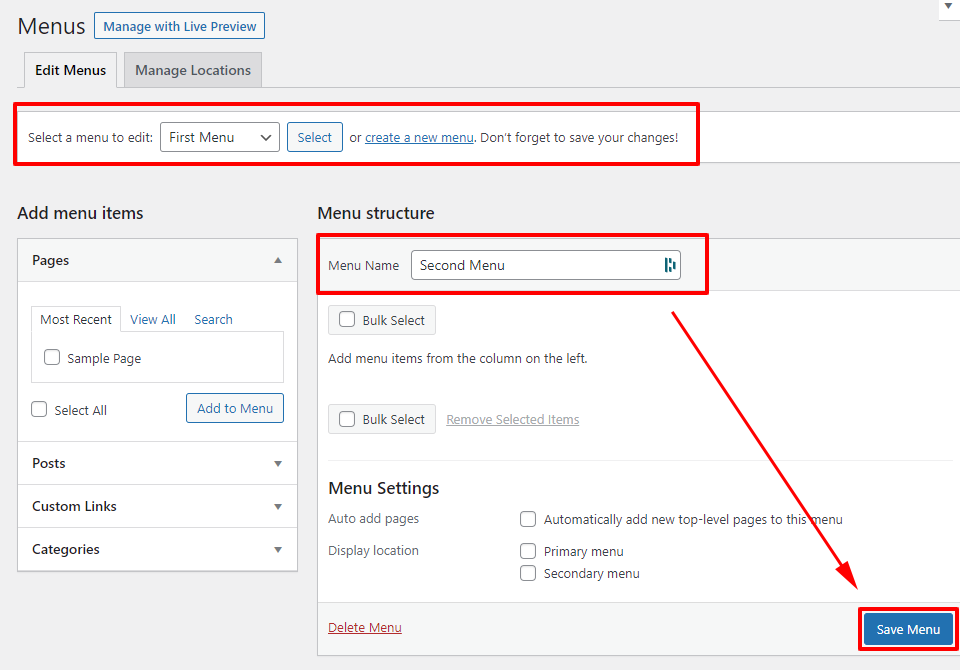
- Either create a new menu, or select and existing menu to begin editing.
- If you choose to create a new menu, give you menu a name then scroll to the bottom of the page and press “Save Menu”.
Step #2: Add menu items
Once you’ve created a new menu or selected an existing one then we can go ahead and start adding links to the menu.
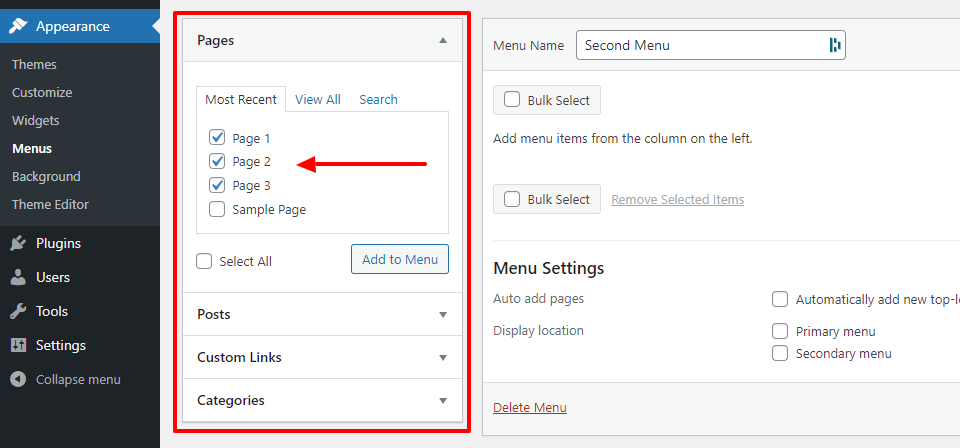
- On the left hand side of the page under “Add menu items” choose the type of menu item you want to add.
- Here, you’ll find all the possible categories on your WordPress site, from posts to channels and links.
- When you click on a category, a drop-down menu will appear.
- Now, you can start selecting the items you want to display in your menu.
Tip: Make sure you don’t add every single item unless it’s necessary. You don’t want an overcrowded menu to confuse your users!
Step #3: Organise your menu
Once you’ve added all the menu items you want, we can begin organizing our menu to look exactly as we like.
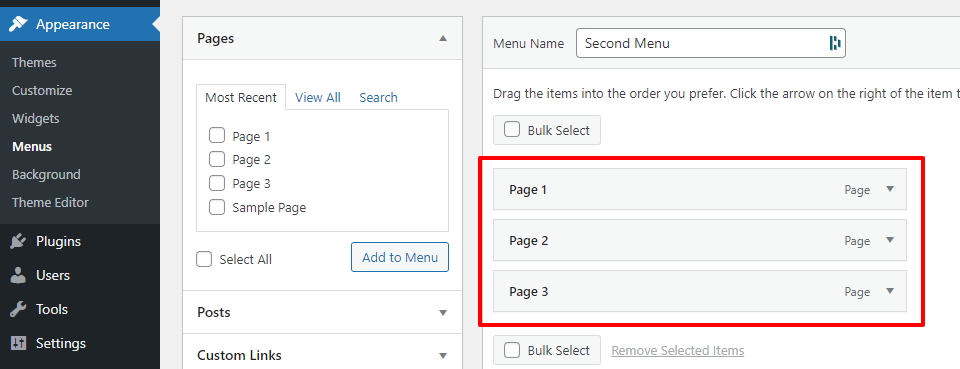
- Now that you’ve selected all the items you need, you can change their order.
- This will allow you more control over how your menu appears to your users.
- You’ll want to keep the most important or frequently visited items at the top for your users’ convenience.
- To move items around, simply drag an item and drop it in the location you want to organize your menu.
Step #4: Create sub-menus
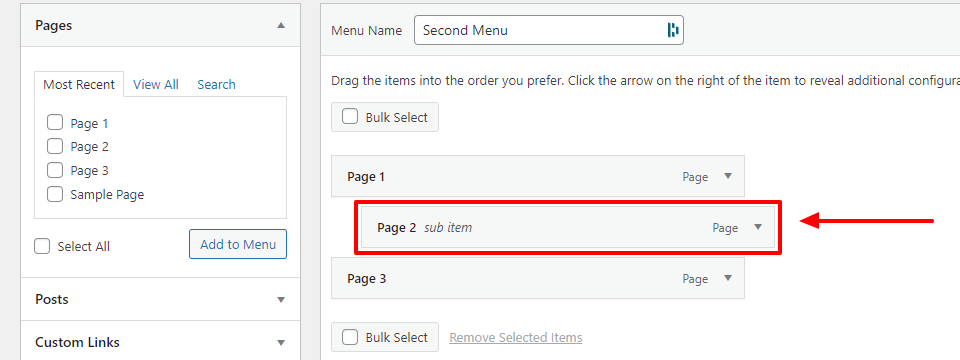
Remember you’re not limited to top level menus only, you can easily create dropdown menus using the drag and drop interface.
This is perfect for sites with lots of content, allowing you to divide your menu into sub-menus as well. This will show your users which category an item might fall under.
- Create a sub-menu by simply dragging an item to the right of your original menu item.
- You can also add multiple other items giving your sub-menu more layers.
- If you wanted to, you can also repeat this process to create sub-menus with multiples levels.
Step #5: Delete and edit menu items
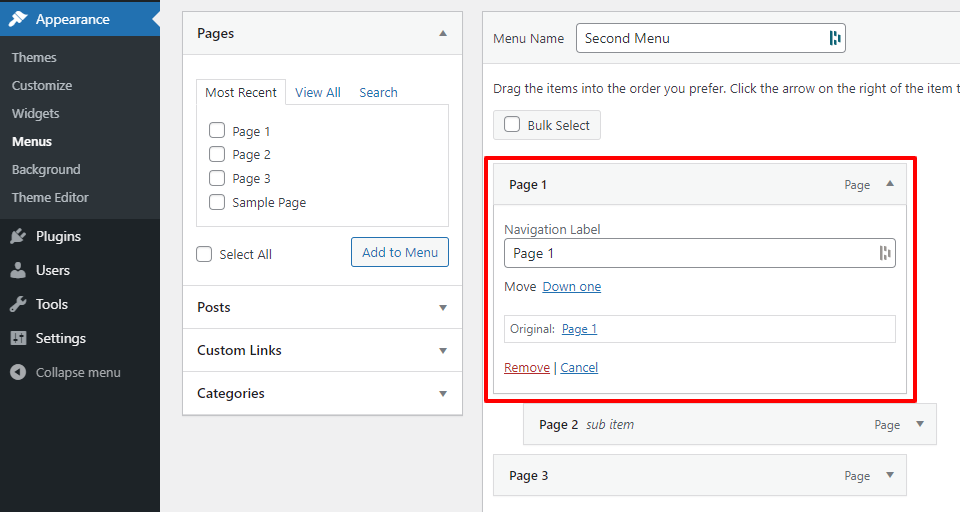
Inidividual menu items can be customizer easily. So you can change the menu title or even add custom CSS classes making it easier when developing.
- To edit a menu item, click on a small arrow visible on the right of menu item.
- Details about the page will pop up, and you’ll find a drop-down menu.
- Click on the “Remove” button to delete the item.
- Alternatively, to edit the name, click on the current name and change it according to your liking.
Step #6: Save menu
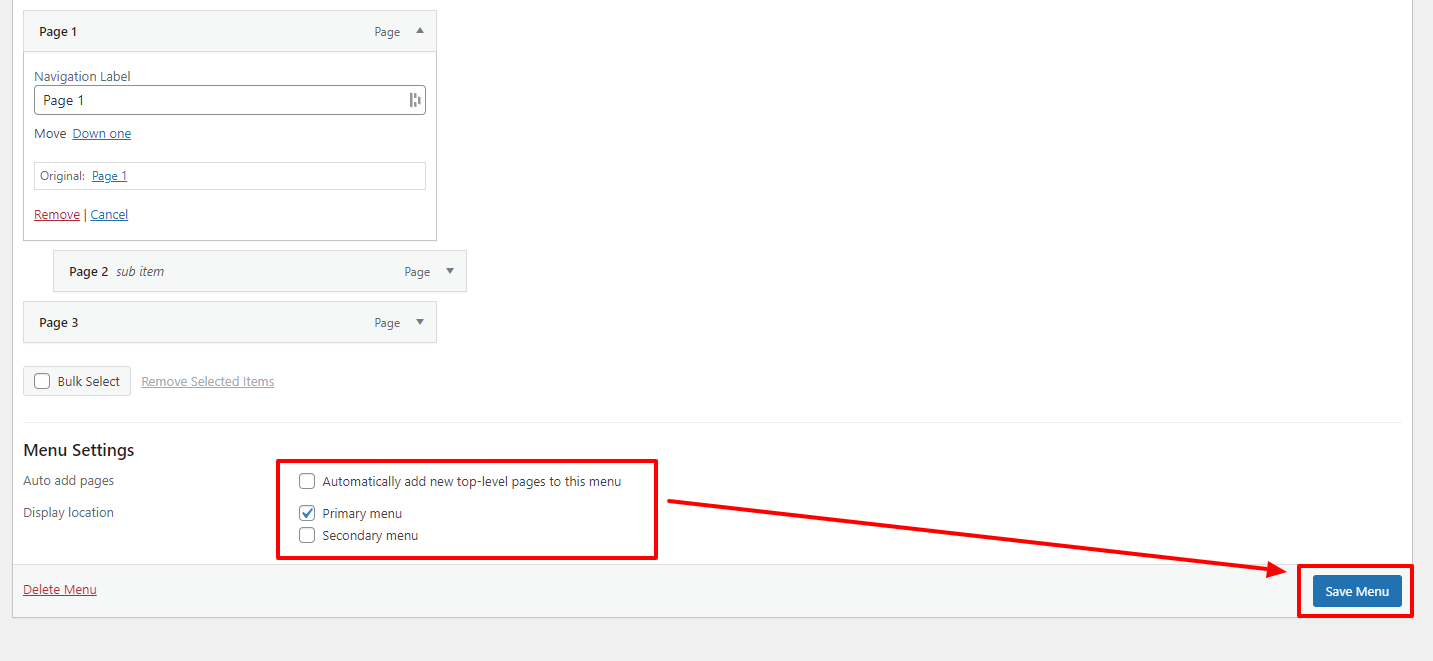
Lastly, once you’re satisfied with the changes you’ve made it time to apply those changes to your site
- Choose the location where you want to display the menu.
- Click on the “Save Menu” button available, and you’re all done!
Final Thoughts
Now that you’ve learned how to add and edit your WordPress menu you can continue building the rest of your site. But remember there’s a few more things to consider which are worth noting:
- When you switch themes, you may need to re-assign your menus as it’s not uncommon for different themes to use different ID’s for their menus.
- Some themes come with multiple menu locations, so feel free to create menus that are different depending on where they appear on your site.
All in all, WordPress makes it super easy to customize your website menus and takes care of all the heavy lifting so you don’t have to worry about it.
